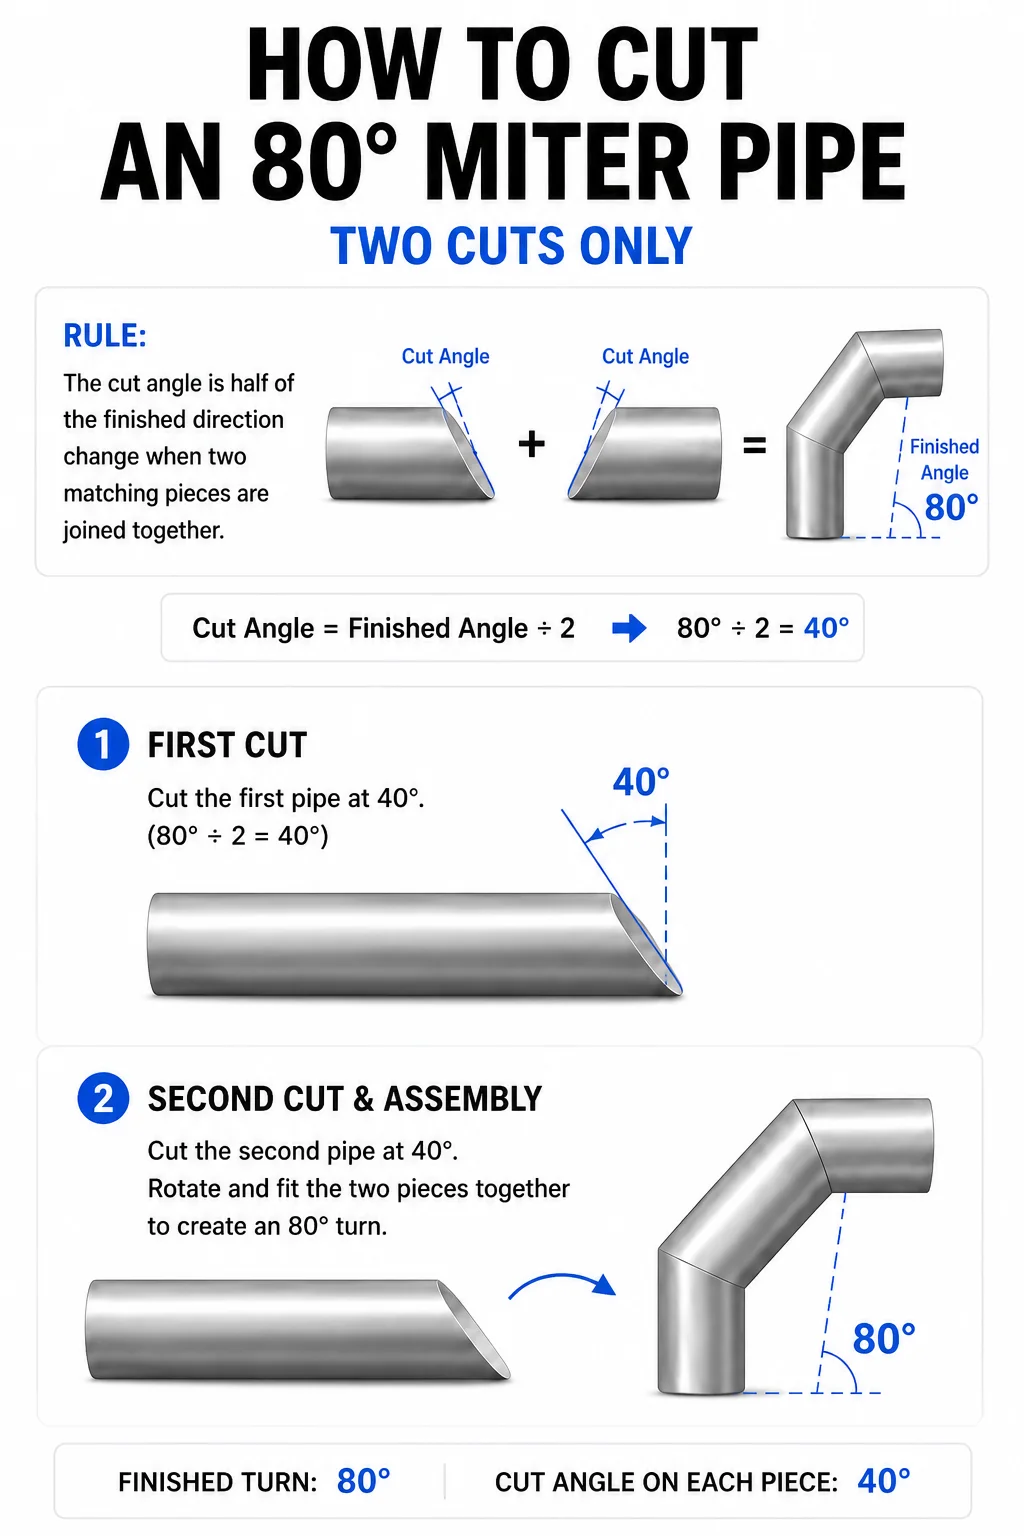
Cutting a miter in round pipe is easier once you understand one rule:
The cut angle is half of the finished direction change when two matching pieces are joined together.
That means:
90° turn = two 45° cuts
45° turn = two 22.5° cuts
22.5° turn = two 11.25° cuts
The two matching cuts come together and create the finished angle.
Before You Start
Start with straight pipe and make sure the end is reasonably square.
You will need a marker or soapstone, tape measure, wraparound or paper template, angle finder or protractor, grinder or saw, and a square for checking the finished angle.
The cleaner your layout is, the better the two pieces will fit.
How to Make a 90° Mitered Turn
A 90° miter is the easiest one to understand.
You need the finished pipe to change direction by 90°.
Divide that by two:
90° ÷ 2 = 45°
So each mating piece needs a 45° cut.
Step 1: Mark the 45° Cut
Choose where you want the center of the turn.
Mark a 45° miter line across the pipe.
If you are using a paper or wraparound template, wrap it tightly around the pipe and transfer the 45° layout all the way around.
Step 2: Cut the Pipe
Cut directly along your marked line.
Keep the grinder or saw as steady as possible.
Do not rush the cut. A crooked cut will create gaps later.
Step 3: Clean the Edges
Remove burrs and high spots with a grinder.
The two mating faces should fit together evenly.
Step 4: Rotate One Piece
Take one of the pieces and rotate it until the two 45° faces meet.
Now the pipe should form a 90° turn.
The math is:
45° + 45° = 90°
Step 5: Check the Angle
Place a square or angle finder against the pipe.
Verify that the inlet and outlet are exactly 90° from each other.
Adjust the fit before welding.
How to Make a 45° Mitered Turn
For a finished 45° change in direction, each piece needs half of 45°.
45° ÷ 2 = 22.5°
So both mating pieces need a 22.5° miter cut.
Step 1: Mark 22.5°
Mark a 22.5° cut across the pipe.
Transfer the layout around the entire circumference.
Step 2: Make the Cut
Cut along the line as accurately as possible.
Keep the cut smooth and consistent.
Step 3: Clean the Joint
Grind off burrs and any uneven areas.
The cleaner the faces are, the tighter the fit will be.
Step 4: Rotate and Fit
Rotate one piece until the two 22.5° faces meet.
The pipe will now change direction by approximately 45°.
The math is:
22.5° + 22.5° = 45°
Step 5: Verify the Angle
Use an angle finder to check the finished turn.
Do not weld until the angle and alignment are correct.
How to Make a 22.5° Mitered Turn
A 22.5° turn is made the same way.
Divide the finished angle in half:
22.5° ÷ 2 = 11.25°
Each mating piece therefore needs an 11.25° cut.
Step 1: Mark 11.25°
Lay out an 11.25° miter on the pipe.
Because this is a shallow angle, accuracy matters even more.
A small layout error can noticeably change the finished angle.
Step 2: Cut Carefully
Follow the line closely.
Try not to remove extra material beyond the mark.
Step 3: Clean the Faces
Deburr and lightly grind the edges until both pieces fit together evenly.
Step 4: Rotate the Piece
Rotate one section and bring the two 11.25° faces together.
The finished pipe should turn 22.5°.
The math is:
11.25° + 11.25° = 22.5°
Step 5: Check the Finished Angle
Use an angle finder or protractor to verify the turn before tacking or welding.
Quick Miter Angle Reference
Finished Turn
Cut on Piece 1
Cut on Piece 2
90°
45°
45°
45°
22.5°
22.5°
22.5°
11.25°
11.25°
The formula is always the same:
Cut Angle = Finished Angle ÷ 2
So if you need a different angle later, simply divide the finished direction change by two.
The Simplest Way to Remember It
If you want a:
90° turn — cut 45°
45° turn — cut 22.5°
22.5° turn — cut 11.25°
Then rotate the second piece, bring the matching faces together, and check the finished angle.
The most important part is not the cutting itself.
It is making an accurate layout first.
Good layout = good fit-up. Good fit-up = less grinding, less fighting, and a cleaner finished joint.


